
Manual Pick and Place by V.K. Papanikolaou is licensed under a Creative Commons Attribution 4.0 International License.
If you are dealing with tiny SMD parts (e.g. 0402 resistors and capacitors), a manual pick and place machine is a helpful piece of equipment for prototyping and small-batch manufacturing. On the other side, traditional SMD placement using precision tweezers not only requires an ultra-steady hand but also becomes a tiresome drill, especially when working long hours upon fine-pitch PCB footprints.

However, commercial manual pick & place machines are ridiculously expensive ! You have to spend thousands on e.g. this magnificent piece, or even over one thousand for bottom line ones like this.
You would think : Hey, one thousand for a couple of X-Y sliding metal bars ? That was my idea, when started to design my own : total cost ? well under € 100 !

The plans are here in .dxf format (right click - Save As). Grab a free .dxf viewer and check it out. They are pretty self-explanatory : you will need some pieces of MDF, aluminum angles, some bearings and lots of bolts, washers and nuts, all found in your local store. Moreover, you will need a cheap vacuum pen and an small aquarium pump, which has to be reversed in order to work in suction, as explained here. You can even add more extras, like a USB microscope for enhancing the SMD placement precision.

First step is to assemble the base of the machine. No difficulties here; just make sure that the upside-down angles (sliders) are perfectly parallel to each other. A good tip is to make the mounting holes one millimeter (sorry US friends !) larger that the bolt thread diameter, so that it will be easier to make fine adjustments afterwards.

Next step is to prepare the short horizontal slider angles with the addition of bearings, as described in the plans. Here they are, fully assembled :

Now attach them to the underside of the horizontal tray with using wood screws and washers. Be careful : use only four screws per slider and tight it up from their sides. Place the tray on the base before tightening fully; make sure that the tray slides freely and all eight bearings are touching the bottom sliders at the same time (you can still readjust the base sliders as well). Now you have a fully working horizontal tray (x-axis) !


Next step is to prepare the pen holder slider as described in the plans. The pen holder slides on the horizontal tray (y-axis) by using eight bearings and two aluminum angles mounted on the tray, mirrored to each other (thanks to this guy for sharing his idea). If your bearings are not touching both angles at the first time don't worry; use two large washers to uplift one of the angles and then make necessary fine adjustments. With a bit of patience, the pen slider will work flawlessly without any jitter.


Now you are ready to place the vacuum pen vertically on its dedicated slider (z-axis). I used two needle bearings (12 mm inner diameter) mounted on the slider by two U-bolts, as shown in the picture. I also used a longer 12 mm tube for the pen, salvaging only the tip and the tail from the cheap manual button-pen I bought from eBay. I also used one U-bolt to mount a USB microscope (at a small angle) next to the vacuum pen. However, you can always use your imagination for alternative configurations (and please share them) !

The last bit : destroy a notepad (a real one !) and get the wire. This kind of wire is excellent for making a short compression spring for the vacuum pen. Wind the wire around the pen tube and it is ready in seconds ! Insert the spring in the tube and secure it at the top with an elastic band (or whatever you may think of), while its bottom sits on the needle bearing. A couple of sewing-machine-oil drops inside the needle bearings is always a good idea. Leave a clearence of about an inch (for my US friends) between the base and the needle tip and your manual pick & place machine is READY !


Now you can pick up your fine SMD components by moving both the tray and pen slider (X-Y) with your arm and lowering the pen with your hand (Z), while activating the vacuum pump (I made a foot switch for this). You already noticed that, thanks to the needle bearings, the pen can rotate around its axis as well, in order to perfectly align the picked component. Max working area 400x200 mm (too much for anything !).
A nice detail for the end - little slots for vacuum pen tips. I am thinking of adding more upgrades in the future, but I've run out of ideas - please send me yours !


Now you can pick up your fine SMD components by moving both the tray and pen slider (X-Y) with your arm and lowering the pen with your hand (Z), while activating the vacuum pump (I made a foot switch for this). You already noticed that, thanks to the needle bearings, the pen can rotate around its axis as well, in order to perfectly align the picked component. Max working area 400x200 mm (too much for anything !).
From my first experience, this machine is VERY accurate ! Hence, I am encouraging you to go for it.
A nice detail for the end - little slots for vacuum pen tips. I am thinking of adding more upgrades in the future, but I've run out of ideas - please send me yours !

Update : since the MDF has tiny spots that may distract vision from small SMD components (e.g. 0402), a nice idea is to apply a white paint coating (matte, not glossy) over the pen usable area :

Here's some views from the USB microscope that is attached next to the vacuum pen. It also features adjustable LED lighting.


Update 2 : found this little gem (memory foam) in eBay for £1 ! It really feels great and looks cool :

And finally, the HD action video is here !
(a big thanks to my friend George for his help on precise wood/metal drilling)
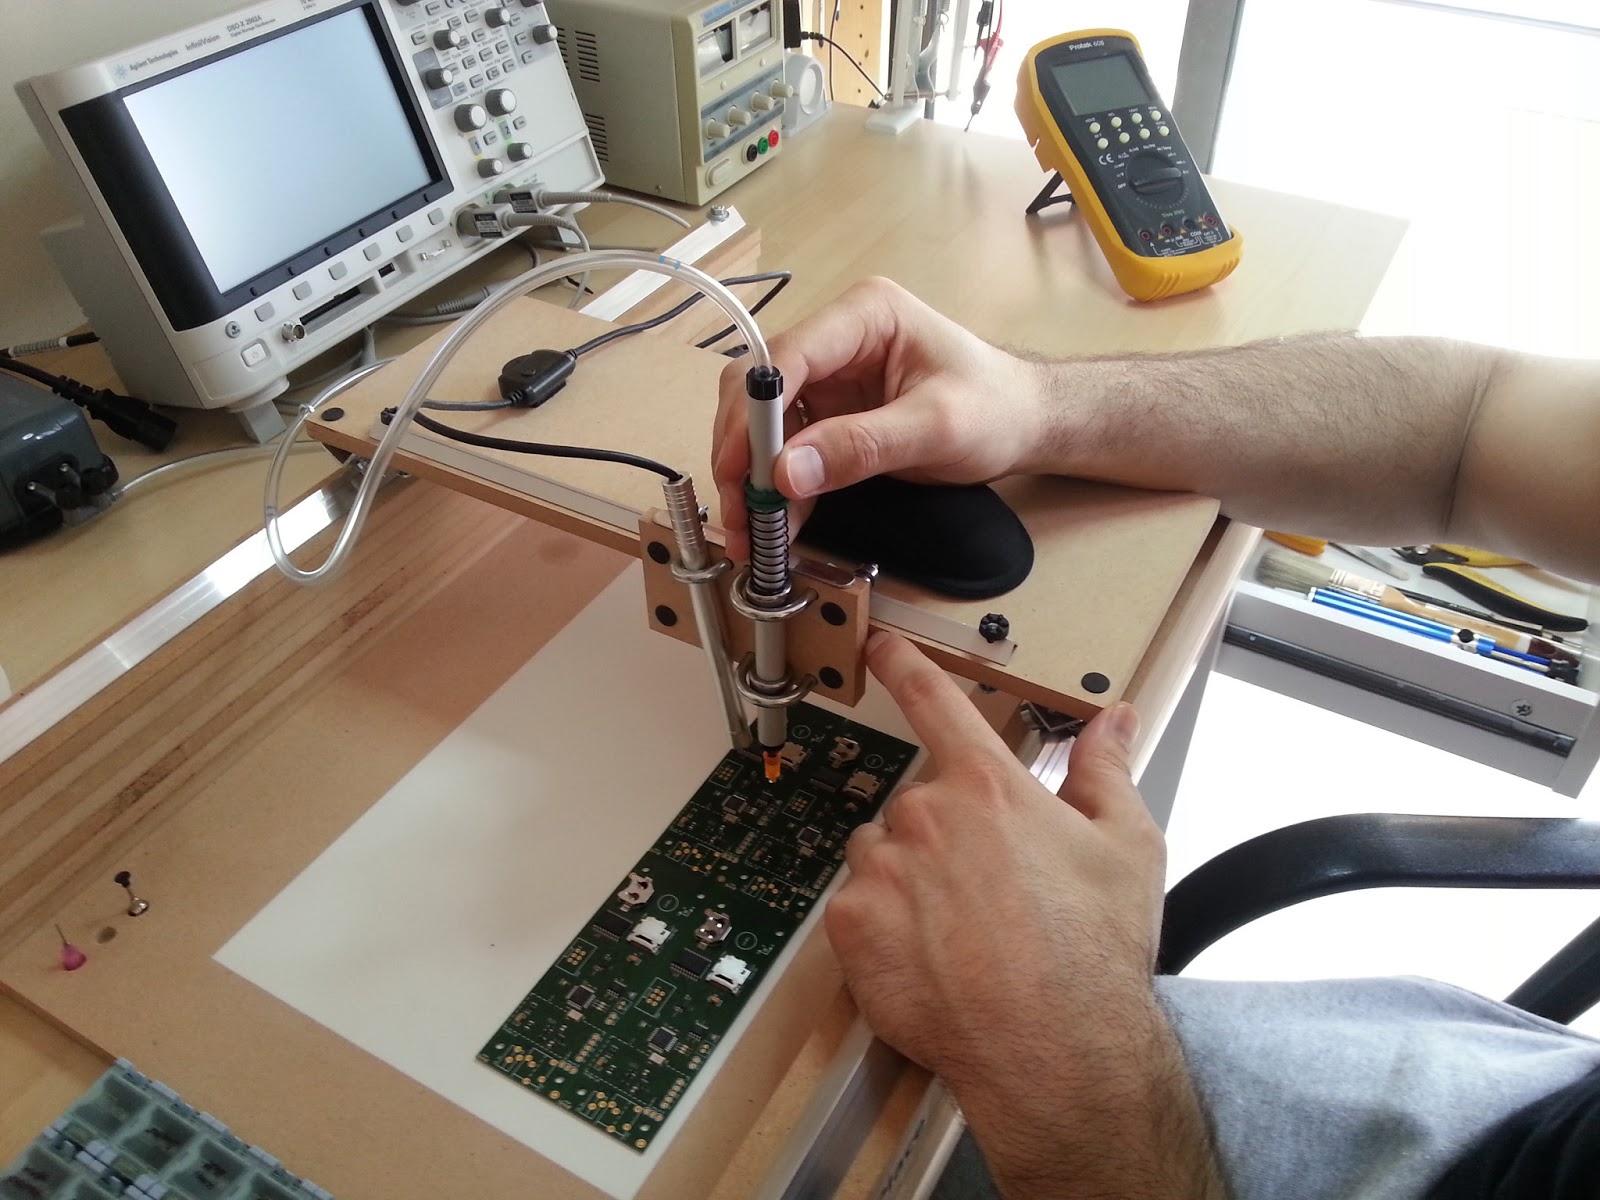
Update 3 (14/05/13) : after placing some hundreds of small 0402 components, I have developed a good technique for better pen stability : I hold the pen with my right hand and I use my left hand to 'lock' the tray into place as shown in the picture below.

View comments